Mipony user manual

Learn to connect accounts, browse and organize files, transfer them between clouds, and configure Mipony.

Getting started and the interface

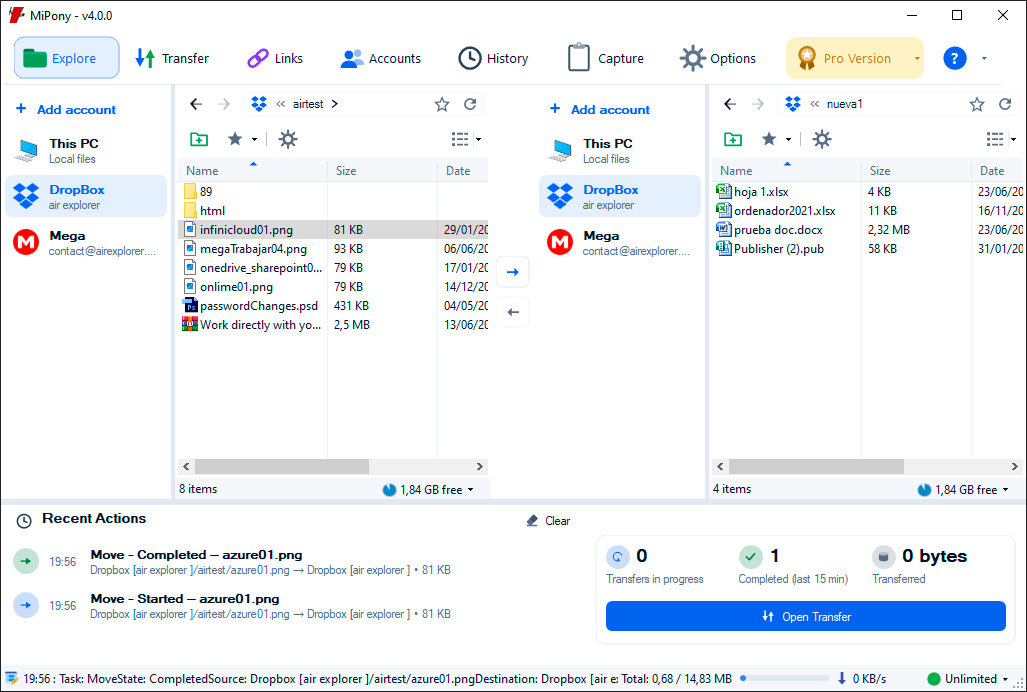
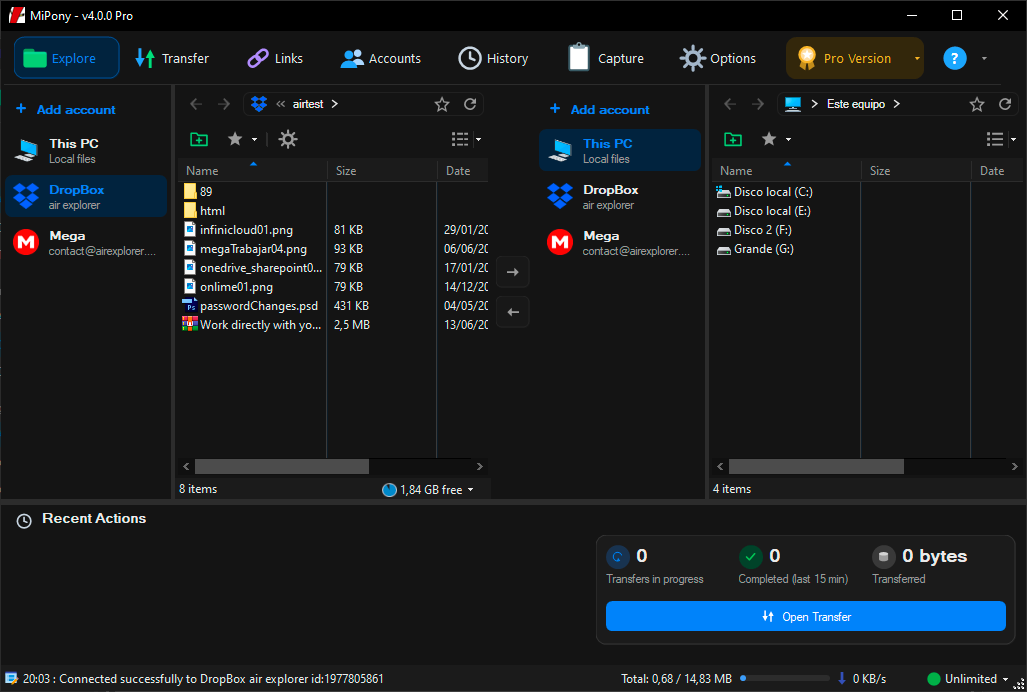
Mipony brings cloud file management and downloads into one window. The top bar opens each workspace; Capture is a toggle and Options opens the settings.

How to use it

  1. Open Mipony and go to Accounts to add your first cloud storage service.
  2. Use Explore to open cloud accounts or This PC in two panes. The central buttons copy from one pane to the other.
  3. Open Transfers to follow operations and History to review completed ones.
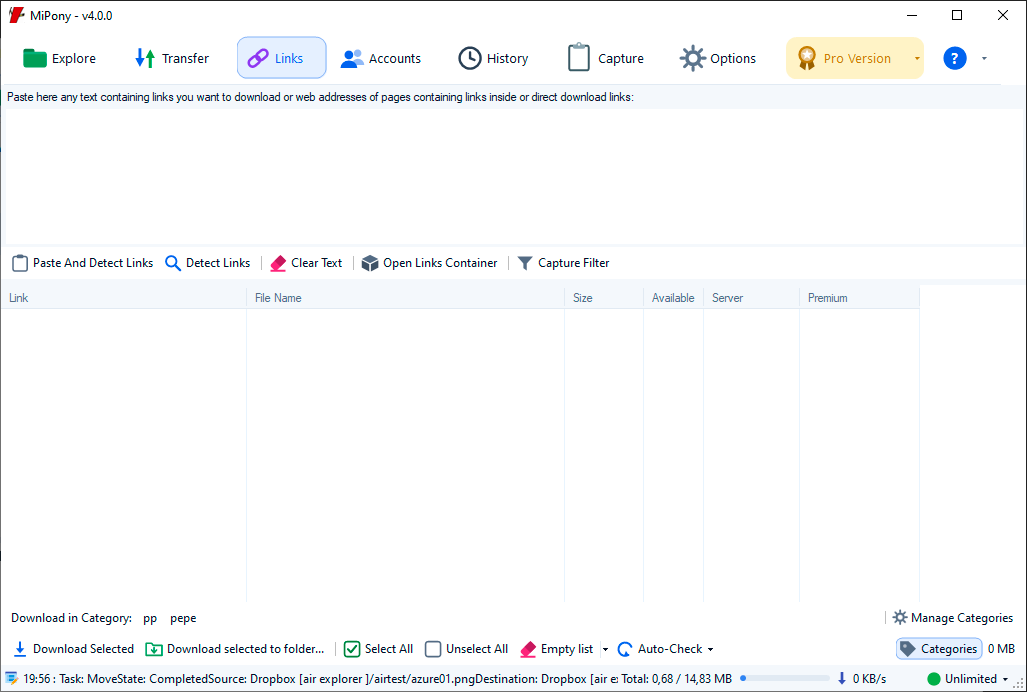
  4. Use Links to detect direct downloads. Turn on Capture if you want Mipony to examine links copied to the clipboard.
Mipony main window with two file explorer panes and top navigation tabs
Back to contents ↑

Add a cloud account

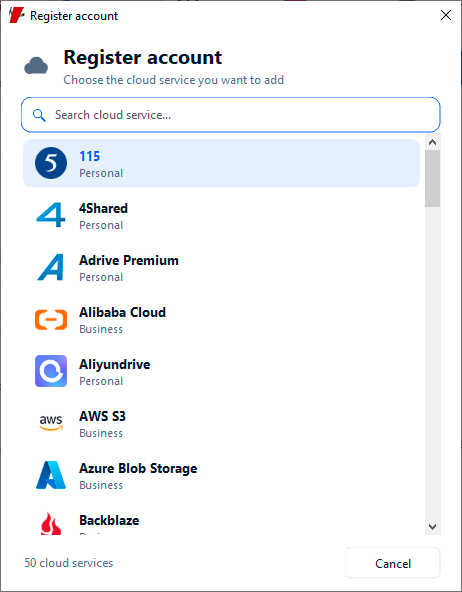
The service picker lists providers available in this installation and lets you search by name or type.

How to use it

  1. Open Accounts and click Add cloud account. You can also choose Add account in either Explore pane.
  2. Search for a service or browse the list, then select the provider you want to connect.
  3. Complete the sign-in or connection details requested by the provider and authorize access when prompted.
  4. When the account appears, click Open to browse its folders in Explore.

Options and tips

  • The sign-in flow depends on the provider. Some services use an authorization page; others request server details or credentials.
  • A provider marked as Pro requires that license before it can be added.
Cloud provider picker with search field and service list
Choose a provider from those installed with Mipony.
Back to contents ↑

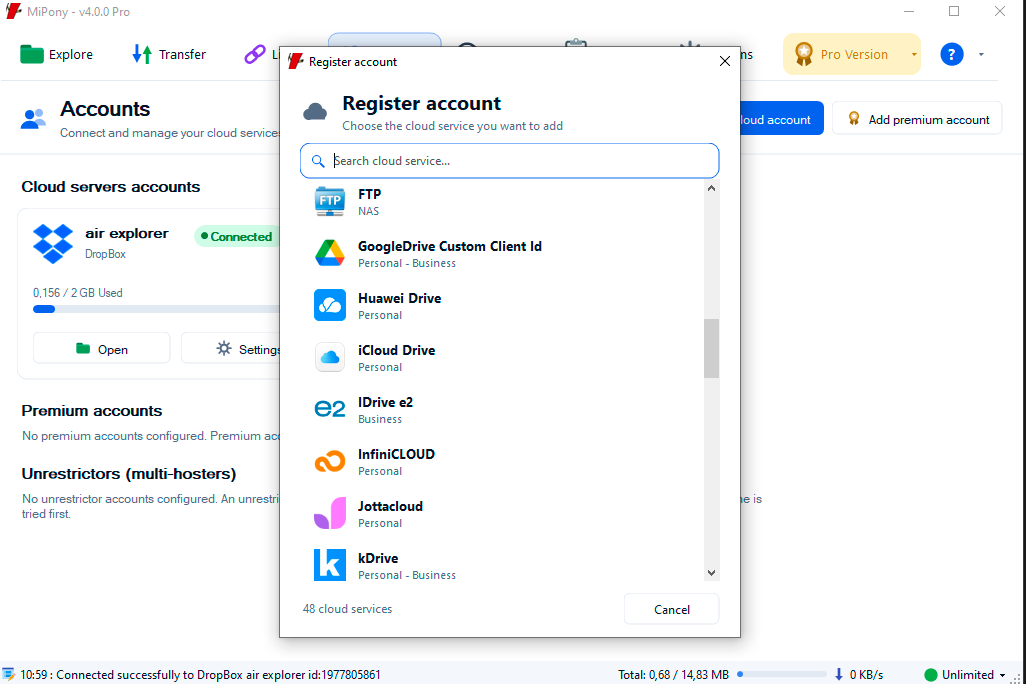
Google Drive with your own ID

To connect Google Drive to Mipony with OAuth credentials from your own project, set them up in Google Cloud first. You will create a project, enable the Google Drive API, and obtain a client ID and client secret. You can then enter them when adding the account in Mipony and authorize access to your files. The guide walks through each step with screenshots.

Read the step-by-step guide →
Mipony cloud account selector showing the GoogleDrive Custom Client Id option
Back to contents ↑

Manage accounts and storage

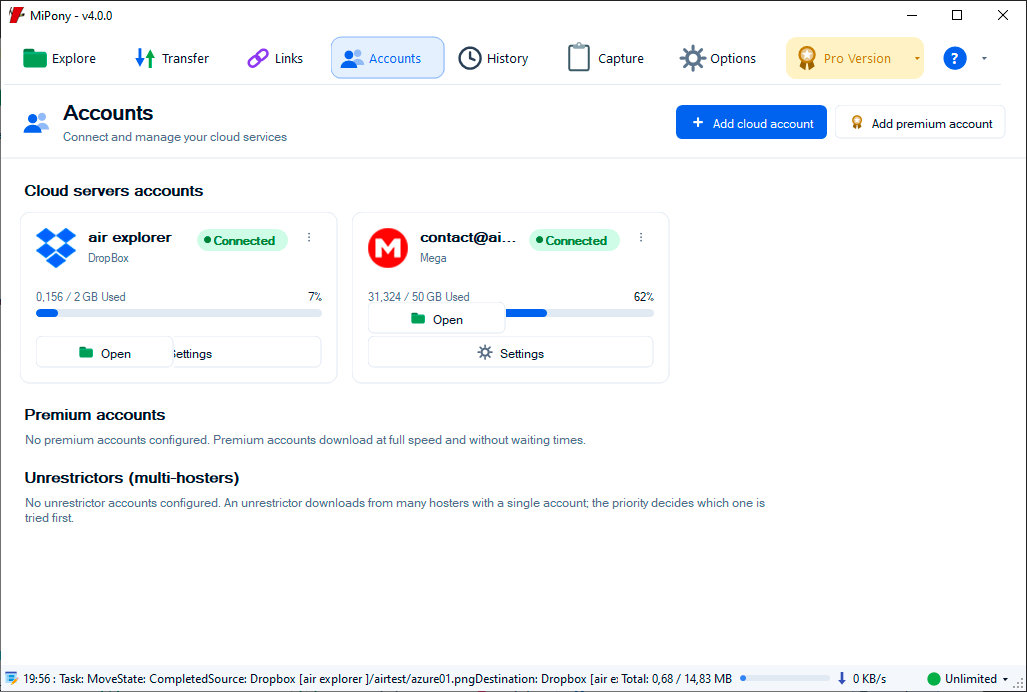
Accounts groups cloud accounts separately from premium direct-download accounts and multi-hoster services.

How to use it

  1. Open Accounts and find the card for the service you want to review.
  2. Click Open to access its files; use the card menu or Settings to edit the account, refresh storage information, or remove it.
  3. In Explore, select an account in the side list. Its context menu can open it in the other pane, refresh the quota, or remove it.
  4. If you use a premium account for a download host, click Add premium account and enter its service details.

Options and tips

  • Removing an account from Mipony does not delete files stored with the provider.
  • Available storage information depends on what the provider exposes.
Accounts tab with cloud service cards and used storage
Back to contents ↑

Browse cloud and local folders

Each half of Explore can show This PC or a cloud account. You can compare folders and set a source and destination without changing windows.

How to use it

  1. Choose This PC or a cloud account in the left pane, then make a choice in the right pane.
  2. Double-click folders to open them, and use the path bar to return to a parent folder or refresh the view.
  3. Select files and folders to prepare a copy or open their context menu.
  4. Change the file view with the view button; use bookmarks to return to common locations.

Options and tips

  • Mipony saves open locations so it can restore them next time.
  • An account's storage quota appears when supported by the provider and can be refreshed from its menu.
Mipony explorer showing cloud accounts and files in two panes
Back to contents ↑

Upload, download, and copy between clouds

The arrows between the panes start a copy from the selected side into the folder open on the other side.

How to use it

  1. Open the source folder in one pane and the destination folder in the other.
  2. Select one or more files or folders in the source.
  3. Click the arrow pointing to the destination. This PC → cloud uploads files; cloud → This PC downloads them; cloud → cloud copies between accounts or folders.
  4. Open Transfers or Recent Actions to check the result.

Options and tips

  • An arrow is enabled only when items are selected and the destination can receive them.
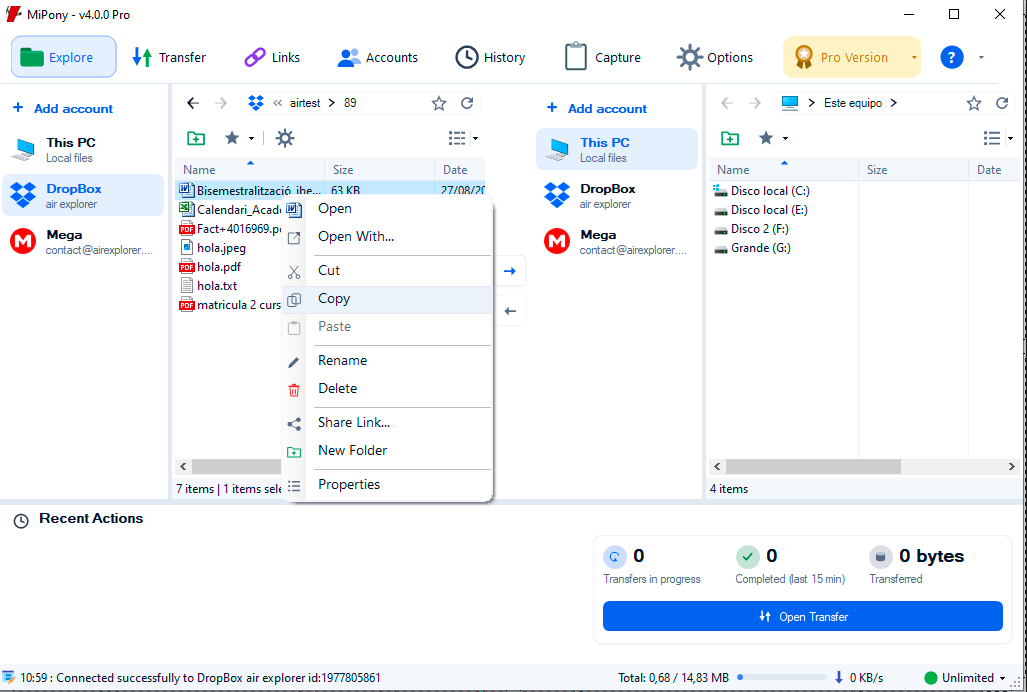
  • You can also use Copy or Cut followed by Paste in the context menu, depending on the location and provider capabilities.
Two Mipony panes with central arrows for copying files between locations
Back to contents ↑

Transfers between clouds

Copy files and folders between your cloud accounts using the two Explore panes. You can choose accounts from the same provider or from different services.

How to use it

  1. Connect both accounts in Accounts if you have not added them to Mipony yet.
  2. Open Explore. In the left pane, select the source cloud account and open the folder containing the files you want to transfer.
  3. In the right pane, select the destination cloud account and open the folder where you want to save the files.
  4. Select the files or folders in the left pane and click the central arrow pointing to the right pane to start copying. To copy in the opposite direction, select items in the right pane and click the arrow pointing left.
  5. Open Transfers to check the status, progress, and speed. Once the operation is complete, check the files in the destination folder.

Options and tips

  • Copying keeps the original files in the source cloud account.
Back to contents ↑

Transfer files between your PC and clouds

You can upload and download files using the two Explore panes in Mipony. You can also upload files by dragging them from Windows File Explorer into a cloud folder open in Mipony.

How to use it

  1. To transfer files within Mipony, open Explore and select This PC in one pane. Open the local folder you want to work with.
  2. In the other pane, select a cloud account and open the destination or source folder.
  3. Drag files or folders from one pane to the other, or use Copy at the source and Paste at the destination. Transfers from your PC to a cloud upload files; transfers from a cloud to your PC download them.
  4. To upload from Windows File Explorer, first open the cloud account and destination folder in one of Mipony's panes.
  5. Open Windows File Explorer, select files or folders on your PC, and drag them into the cloud folder open in Mipony.
  6. Check the progress and results of uploads or downloads in Transfers.
Back to contents ↑

Organize cloud files

The explorer's context menu offers actions for the current folder or selected items.

How to use it

  1. Right-click a file or folder to see available actions.
  2. Use New folder to create a location; Copy, Cut, and Paste to rearrange items; or Rename and Delete to change the selection.
  3. To rename several items, select them together and choose Rename to open the bulk rename tool.
  4. Open Properties for details. If the provider supports them, use Share link or Open in browser.

Options and tips

  • Menu actions vary with the provider, item type, and account permissions.
  • Before deleting, check the selection and the provider's trash rules; not all services allow recovery.
File context menu in Mipony's cloud explorer
Back to contents ↑

Clipboard Capture

Capture watches the text you copy and sends shared links to the Links tab.

How to use it

  1. Click Capture on the top bar to enable it.
  2. Copy an address or text containing shared links in another application.
  3. Return to Mipony and review the results in Links before downloading.
  4. Click Capture again to stop monitoring the clipboard.

Options and tips

  • In Links, you can enable a capture filter to limit which cloud services are detected.
  • Capture does not automatically download everything copied; review the list and destination first.
Back to contents ↑

Control transfers

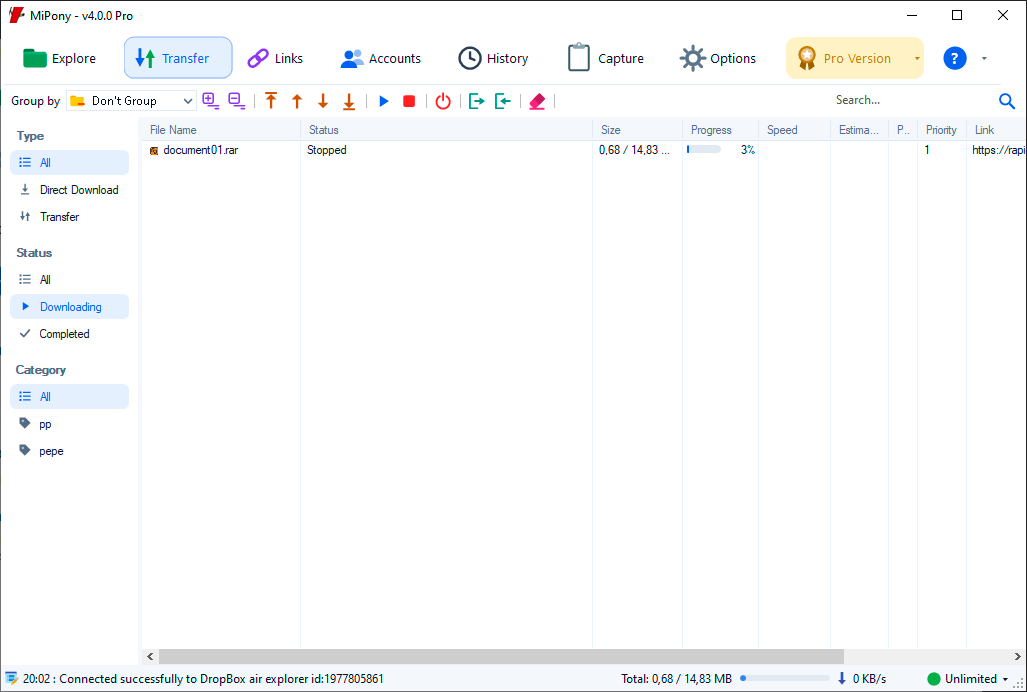
In Transfers, you can monitor cloud operations, including downloads, uploads, and transfers between clouds, with status, size, progress, and speed.

How to use it

  1. Open Transfers. Use search, status filters, and grouping to find a file.
  2. Select an operation and use Start or Resume if it is stopped, or Stop to pause it if supported.
  3. Use Cancel to end an active operation and confirm when Mipony asks.
  4. For a completed or failed operation, choose Run again if available. Open the file or its folder from the context menu when applicable.

Options and tips

  • Stop and Cancel differ: Stop pauses an operation that may be resumed; Cancel ends it.
  • You can also clear completed items, change categories, or inspect properties of the selection.
Transfers tab with operation list, filters, and start and stop controls
Back to contents ↑

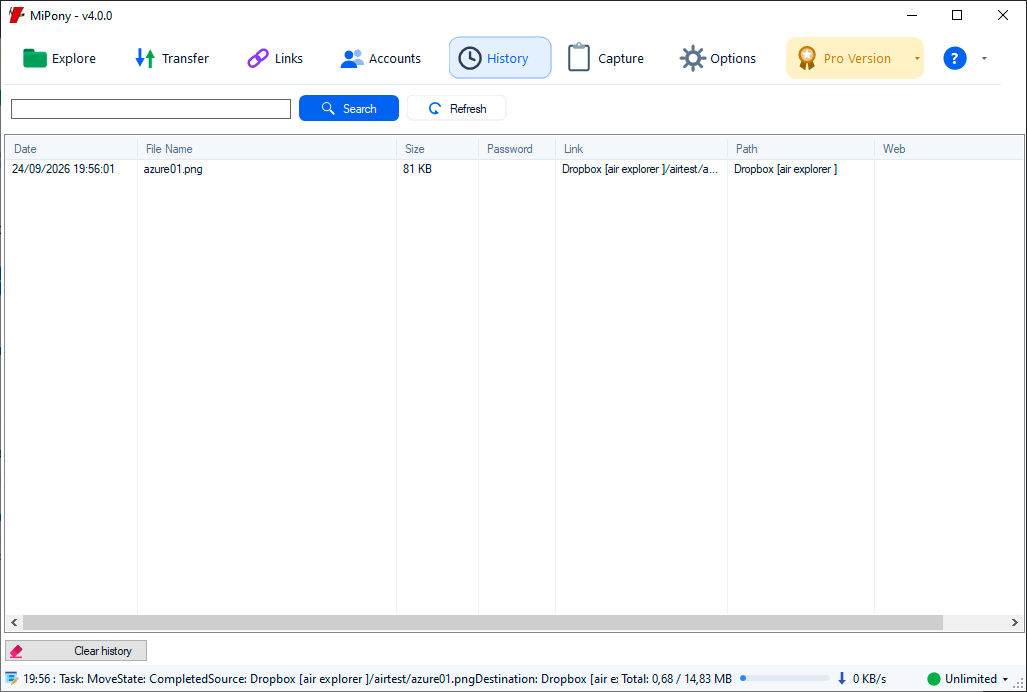
Review History

History shows completed downloads and transfers that Mipony has saved.

How to use it

  1. Open History; the list reloads when the tab is shown.
  2. Type a name or term and click Search to find the next match.
  3. Click Refresh to reload the records.
  4. Use Clear history only when you no longer need those records.

Options and tips

  • History retention is configured in Options → General.
  • Removing a history record is different from deleting a downloaded or cloud file.
History tab with search, refresh, and completed-operation list
Back to contents ↑

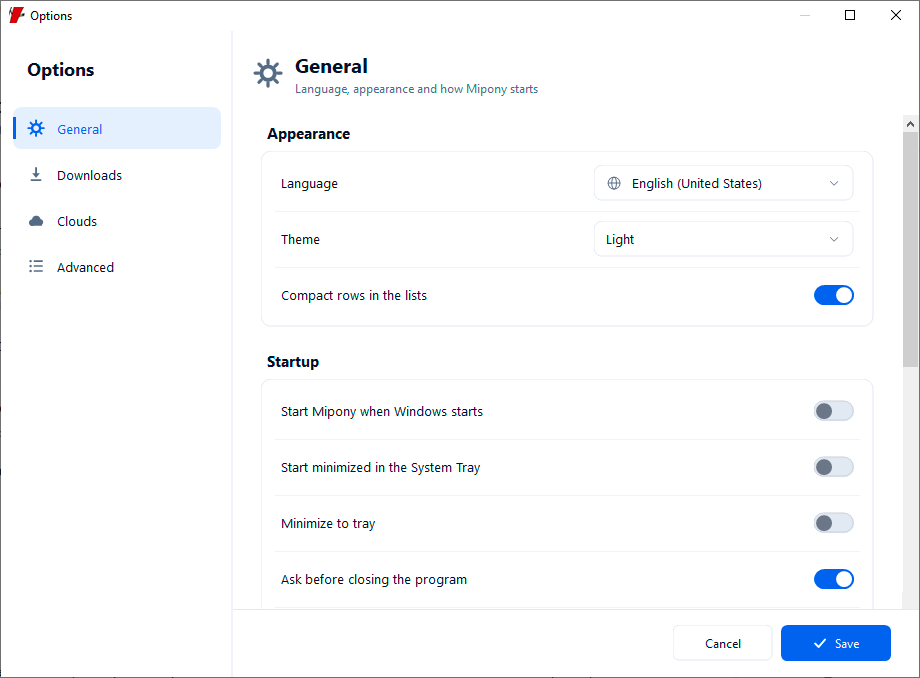
Configure General

Open Options from the top bar. General covers language, appearance, startup, and history; click Save to apply changes.

How to use it

  1. Choose a language and the Auto, Light, or Dark theme. Enable Compact rows if you want more items on screen.
  2. Set startup with Windows, start minimized, minimize to tray, exit confirmation, and notifications.
  3. Choose whether the window comes forward for new links and whether file associations are checked at startup.
  4. Enable History and choose how many days to retain it.

Options and tips

  • File association lets Windows open DLC, RSDF, and CCF containers with Mipony.
  • Click Cancel to close Options without saving.
General options with language, theme, and startup controls
Back to contents ↑

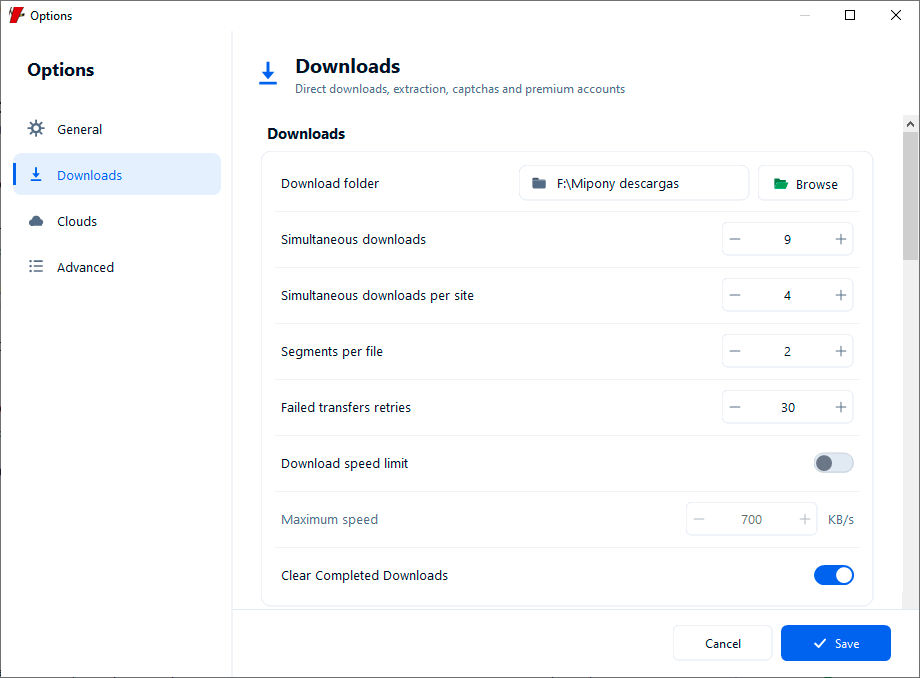
Configure Downloads

The Downloads page controls the settings Mipony uses to download content from cloud storage.

How to use it

  1. Choose the download folder and set simultaneous downloads, downloads per site, segments per file, and retries.
  2. To limit traffic, enable the download speed limit and enter a maximum in KB/s.
  3. Under Extraction, enable automatic extraction of RAR files so Mipony unpacks them once the transfer is complete.
  4. Review the temporary folder and cloud upload settings. Click Save.

Options and tips

  • Downloading to a cloud folder first saves the file in a temporary computer folder, then uploads it to the cloud.
Direct-download options showing destination folder, concurrency, and speed limit
Back to contents ↑

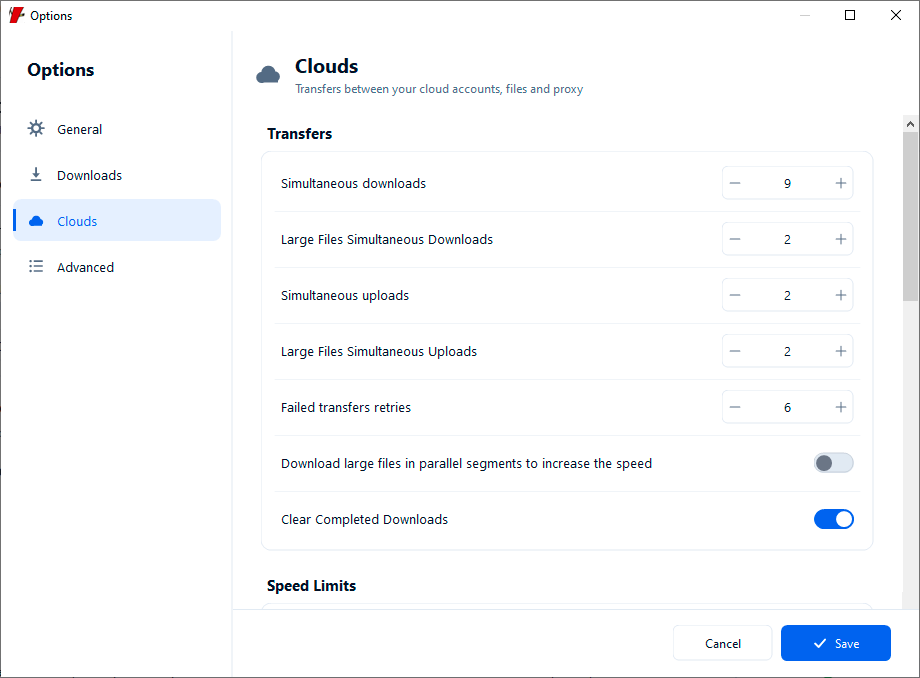
Configure Clouds

Clouds controls concurrency, speed, and file handling for transfers between accounts.

How to use it

  1. Set how many cloud downloads and uploads can run at once, including separate limits for large files.
  2. Choose retry counts and, if needed, enable parallel download segments or clearing completed items.
  3. Enable download and upload speed limits and enter their maximum values in KB/s.
  4. Review file checking on upload and download, hidden files, and deletion behavior; save the changes.

Options and tips

  • Mipony uses the proxy configured in Windows. Enter credentials under Clouds only if that proxy requests them.
  • Some settings have no effect on providers that do not support the corresponding capability.
Cloud options with simultaneous-transfer limits and retries
Back to contents ↑

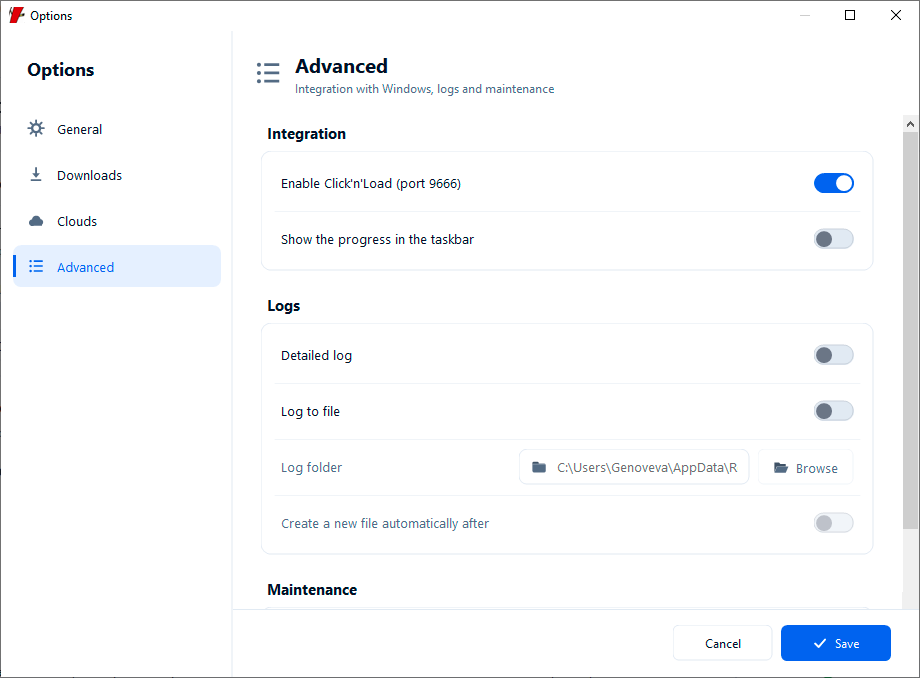
Configure Advanced

Advanced groups Windows integration, diagnostic logs, and access to the settings folder.

How to use it

  1. Enable Click'n'Load if you use a compatible application that sends links to port 9666.
  2. Enable taskbar progress display in Windows if useful.
  3. To investigate an issue, enable detailed logging or logging to a file; choose the folder and whether to create new log files.
  4. Click Open settings folder to locate saved configuration files, then save changes.

Options and tips

  • Detailed logs can create more data; turn them off after troubleshooting.
  • Cloud proxy settings are under Options → Clouds.
Advanced options with Windows integration and diagnostic logging
Back to contents ↑

Troubleshoot common problems

First check the account, destination, and operation status. Available actions depend on the service.

How to use it

  1. If a cloud does not open, return to Accounts, check its status, and repeat authorization or review its settings if requested.
  2. If copying is unavailable, confirm files are selected at the source, the destination folder is open, and the account has write permission.
  3. If a transfer fails, inspect its status and properties, check storage space and connectivity, and use Run again when available.
  4. If a link is not detected, check the address, try Detect links manually, and review Capture or its filter.
  5. For persistent issues, enable logs in Options → Advanced and use Help to check updates or send a report.

Options and tips

  • A missing or disabled action may mean the provider does not support it or the current selection is invalid.
  • Transfers and History are different views: a completed operation may also appear in History.
Back to contents ↑